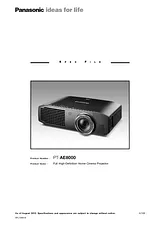
User Manual (PTAE8000U)Table of Contentsfront cover1Specifications2Specifications - 23Dimensions4Terminals4Standard setting-up position5Projection distance for 16:9 aspect ratio screen5Projection distance for 2.35:1 aspect ratio screen6Projection distance for 2.35:1 aspect ratio screen (Lens Memory)6Calculation of the projection distance6Shift range7Installable angle7List of compatible signals8Supported 3D video signal list9Serial connector10Pin assignments and signal names10Communication conditions (factory setting)10Basic format10Cable specifications10Control commands11Control command parameters12Status request commands12Command example13Notes on projector placement and operation13Direction of air intake and exhaust13Operating the projector continuously13Size: 1.71 MBPages: 13Language: EnglishOpen manual
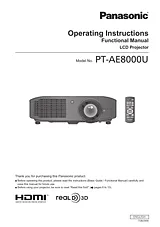
User ManualTable of ContentsImportant Information6Read this first!6Precautions for use14Cautions when transporting14Cautions when installing14Cautions on use16About disposal16Accessories17Optional accessories17Preparation18About your projector18Remote control18Projector body19Getting Started21Setting up21Projection method21Parts for ceiling mount (optional)21Projection related22Front adjustable feet and throwing angle23Lens shift and positioning24Connections26Before connecting to the projector26Connecting example: COMPONENT IN/S-VIDEO IN/VIDEO IN26Connecting example: HDMI IN/COMPUTER IN273D IR Transmitter (optional accessory) connection27Basic Operation28Switching the projector on/off28Power cord28Power indicator28Switching on the projector29Switching off the power30Projecting an image31Selecting the input signal31Adjusting the image31Remote control operation32Managing the lens control settings32Selecting the picture mode32Adjusting the picture32Loading a saved setting33Displaying the [VIERA LINK] menu33Displaying the waveform monitor33Resetting to the default settings33Submenu34Switching the input signal34Using the <FUNCTION> button34Displaying the [3D SETTINGS] menu34Viewing 3D Images35About viewing 3D images35Communication range of a 3D IR Transmitter and 3D Eyewear36Cautions when using 3D Eyewear36Settings37Menu navigation37Navigating through the menu37Menu list38[PICTURE] menu40[PICTURE MODE]40[CONTRAST]40[BRIGHTNESS]40[COLOR]40[TINT]40[COLOR TEMPERATURE]41[SHARPNESS]41[DYNAMIC IRIS]41[WAVEFORM MONITOR]41[SPLIT ADJUST]44[ADVANCED MENU]45[PICTURE MEMORY]58SIGNAL MODE59[POSITION] menu60[H-POSITION]60[V-POSITION]60[DOT CLOCK]60[CLOCK PHASE]60[ASPECT]61[WSS]63[OVER SCAN]63[KEYSTONE]63[AUTO SETUP]63[3D SETTINGS] menu64[SCREEN SIZE]64[3D INPUT FORMAT]64[LEFT/RIGHT SWAP]66[3D PICTURE BALANCE]66[2D TO 3D]69[3D EYEWEAR BRIGHTNESS]70[3D IR TRANSMITTER]70[3D VIEWING MONITOR]71[3D MOTION REMASTER]72[3D SAFETY PRECAUTIONS]72[LENS CONTROL] menu73[ZOOM/FOCUS]73[LENS MEMORY LOAD]73[LENS MEMORY SAVE]74[LENS MEMORY EDIT]74[AUTO SWITCHING]75[H-AREA POSITION]76[V-AREA POSITION]76[LEFT MASKING AREA]76[RIGHT MASKING AREA]76[UPPER MASKING AREA]76[LOWER MASKING AREA]76[PROCESSING MESSAGE]76[OPTION] menu77[ON-SCREEN DISPLAY]77[BACK COLOR]77[STARTUP LOGO]78[AUTO SEARCH]78[HDMI SIGNAL LEVEL]78[FRAME RESPONSE]78[PROJECTION METHOD]78[TRIGGER 1/2 SETTING]79[SLEEP]80[HIGH ALTITUDE MODE]80[LAMP POWER]81[FUNCTION BUTTON]81[VIERA LINK SETTINGS]81[OTHER FUNCTIONS]83[TEST PATTERN]83[LAMP RUNTIME]83[INITIALIZE ALL]84Maintenance85TEMP and LAMP Indicators85Managing the indicated problems85Care and replacement87Before cleaning the projector / replacing components87Cleaning the projector87Component replacement89Troubleshooting94Ceiling mount bracket safeguards95Appendix96Using VIERA Link96Summary of VIERA Link features96VIERA Link “HDAVI Control”97Technical information100List of compatible signals100Supported 3D video signal list101Serial terminal102Specifications106Dimensions108Index109Size: 17.9 MBPages: 110Language: EnglishOpen manual